Step 1 – Add Attributes to Client Business Object
- Go to the Client business object and add a new attribute Age of type Number
- Save the Attribute
- Deploy you solution; log out and then log in.
Step 2 – Changing the Modify, Detail, and New Client Screens
- Add an Age NumberField to the Modify and New Client screens; make sure the field is bound to the attribute in the storeClients store
In the Modify and New Client screens also change the Department field to a Combobox by adding the following code in place of the Textfield
Code Block <ext:ComboBox runat="server" HiddenName="Department1_Value" FieldLabel="Department" AutoRender="False" ID="Department1"> <Template ID="XTemplate1" EnableViewState="False"></Template> <Items> <ext:ListItem Text="Professional Services" Value="Professional Services"></ext:ListItem> <ext:ListItem Text="Solution Delivery" Value="Solution Delivery"></ext:ListItem> <ext:ListItem Text="Engineering" Value="Engineering"></ext:ListItem> <ext:ListItem Text="Quality Assurance" Value="Quality Assurance"></ext:ListItem> </Items> </ext:ComboBox>
- In storeClients make sure all the new fields are connected to attributes of business object Client.
- To the Detail screen, simply add an Age label and also tie it back to the store.
- The altered pages should look thus:


- Make sure the pages are saved and deploy the solution; log out and log in.
- Go to the application and add age and department data to several of your clients.
Step 3 – Create a View
- In the Navigation Library, go to Data Management and then go to Views

- Click New View and call it Age View; set Primary Object to Client; click Save
- Click on the Fields tab and move FirstName and Age to the right-hand panel
- Click on the Where tab
- Click Add Term
- Set Type to Compare
- Under Expression 1 set Field to Age
- Set Operation to Greater or equal
- Under Expression 2 set Constant to Number 30
- Click Save at the top left of the screen
- The SQL code at the bottom of the page should look like this: select A0.COL_ID ID, A0.COL_FIRSTNAME CLIENTFIRSTNAME, A0.COL_AGE CLIENTAGE from TBL_CLIENT A0 where (((A0.COL_AGE >= 30)))
- Click Save at the bottom right of the page
- Deploy your solution; log out and log in again
Step 4 – Create a View Page
- Create a new page called Age View
- Add a Unified Store called storeAgeView
- In properties set Data Source Type to Business Views
- Set Data Source to Age View
- Check the List checkbox
- Click Save
- Drag a Grid into pnMain and call it grdAgeView
- Click on Settings and set Data Source to storeAgeView[list]
- Move the ClientFirstName and ClientAge columns over to the right
- Change the header of ClientFirstName to First Name and of ClientAge to Age
- Check the AutoExpand checkbox in ClientAge; click Apply
- In the General tab, check the Use Paging checkbox and select Row Selection in the Selection Model; click Apply and Save
- Click on Preview to preview your page.
- Click Save Page at the top left of the screen.
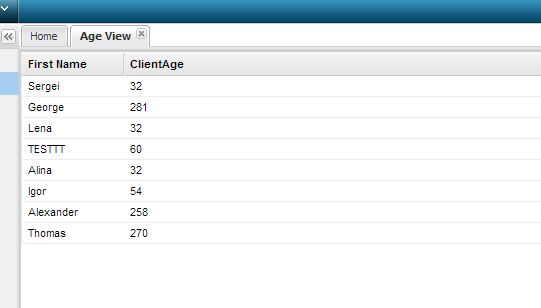
- Attach your page to your application and deploy; log out and log in to find the page in your application
- The result should be this: