Step 1 – Create a Client Detail Page
The Detail Screen will load from the Client List and populate with all the Client's information
- Click on Presentation and then Pages.
- Click New Page


- From Categories, select General and from Templates select Blank; name the page Client Detail; click Save.
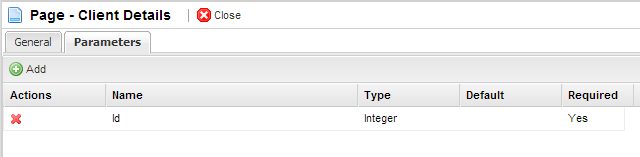
- On save you will be redirected to the detail page of the New Client Detail page, from here click on the Parameters tab
- Add a new parameter, name Id, type Integer, and set Required to Yes
- Go to the General tab and launch the Page Builder by clicking on Page Builder


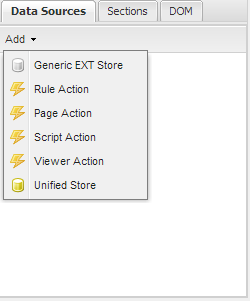
- In Data Sources click the Add button and add a Unified Store

- Set its ID to storeClients and click Create
- Make sure storeClients is selected and in the Properties panel at the right of the screen, click on Settings
- Set Data Source Type to Business Objects
- Set Data Source to Client
- Check the Detail checkbox
- Find the Id parameter and double click on its Value column
- Select Id as the page parameter
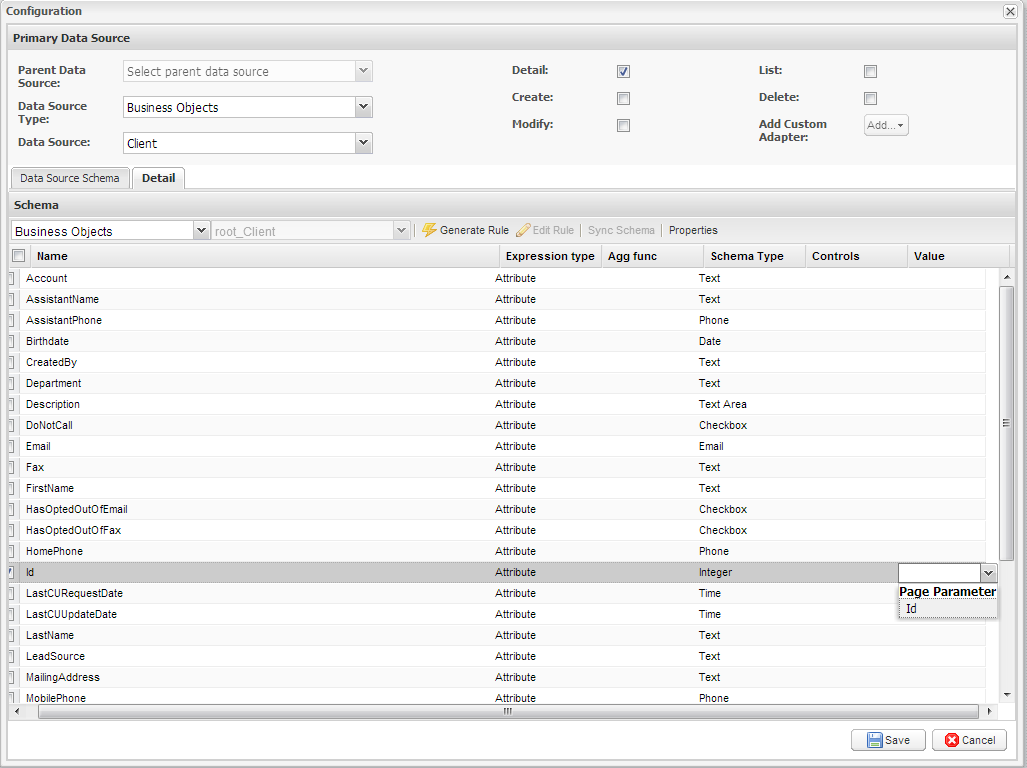
- Click on Properties and check the Auto Load checkbox
- Click Save, and Save again in the Configuration window
- Click Save
- In the Sections tab in the Page Builder, make sure pnMain is selected
- Find Layout in Properties and change it from fit to form, set its padding to 20 and click Save at the bottom of the Properties panel.
- You will now add elements to to pnMain
- Add a Form Panel called pnGeneralInfo, title General Information; set its border to false
- To pnGeneralInfo add a panel called pnTopColumns1 and set its border to False; set its layout to column and its height to 60
- Add two FormPanels to pnTopColumns, one called pnRight1 and one called pnLeft1, and set their ColumnWidths each to .5, and their borders to false
- Double click on pnLeft1 to see its design surface
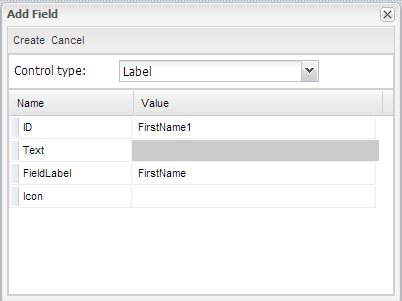
- In Data Sources lick on storeClients and find all the storeClients fields in the Toolbox
- Drag FirstName and LastName into pnLeft1; make sure text is left blank and change the control type to Label; click Create
- Follow the same steps in pnRight2 except add Email and MobilePhone
- In the Sections tab, click on pnGeneralInfo and find pnGeneralInfoon the design surface
- Again, click on storeClients in Data Sources and drag the MailingAddress field from the Toolbox onto pnGeneralInfo
- Change its control type from TextField to Label; make sure Text is set to blank; in Properties, set its width to 600
- Click Create
- To pnGeneralInfo add a panel called pnTopColumns1 and set its border to False; set its layout to column and its height to 60
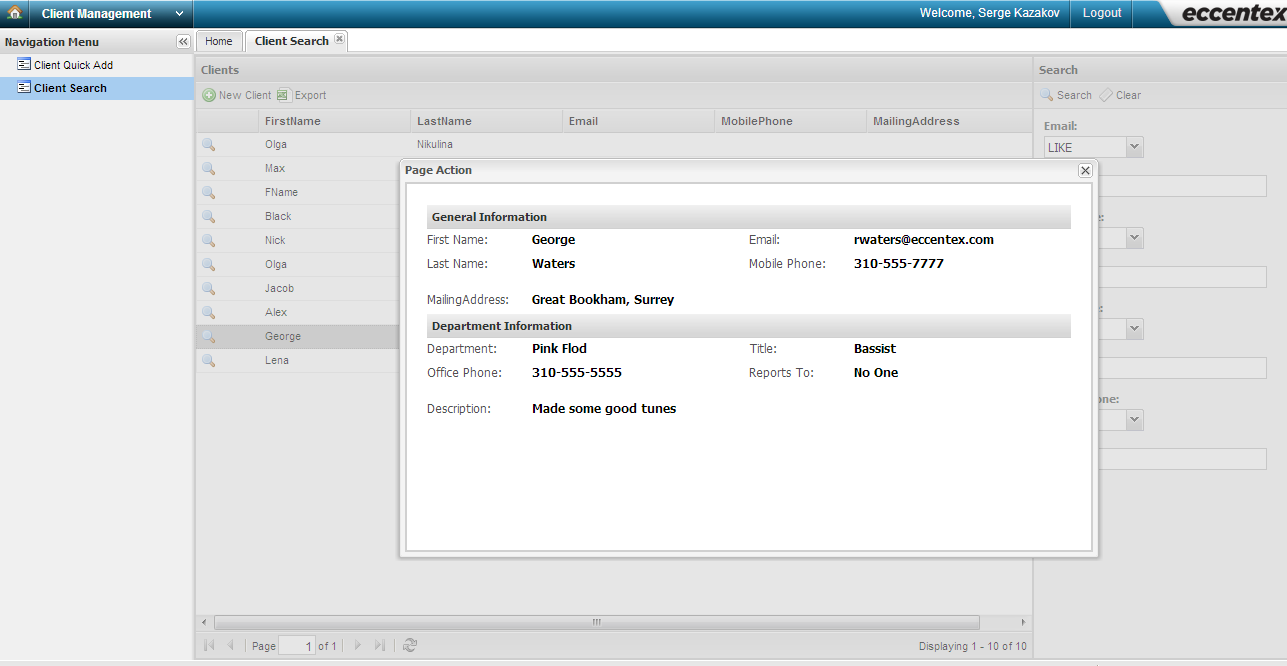
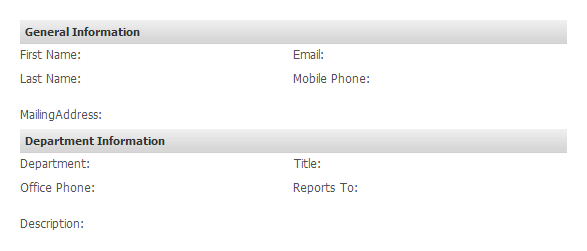
- Create a similar panel for Department Information for the following final result when viewed in Preview:
- Add a Form Panel called pnGeneralInfo, title General Information; set its border to false
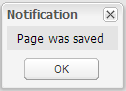
- Click on Save Page at the top left of the screen, and click Ok to the Page Was Saved notification

Step 2 – Adding the Detail Screen to the Client Search Page
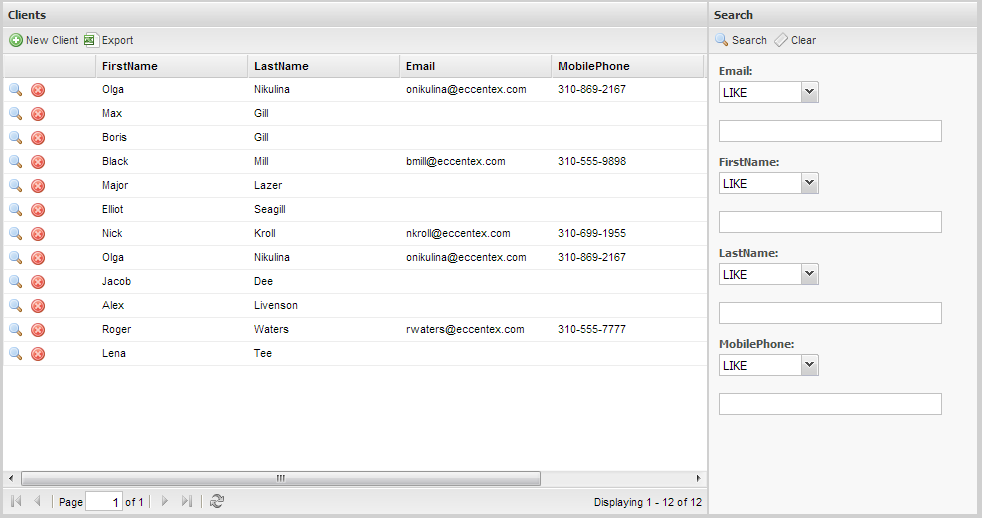
- Find the Client Search Page
- Add a new Data Source, a Page Action, called clientDetailPage
- Open its Configuration screen
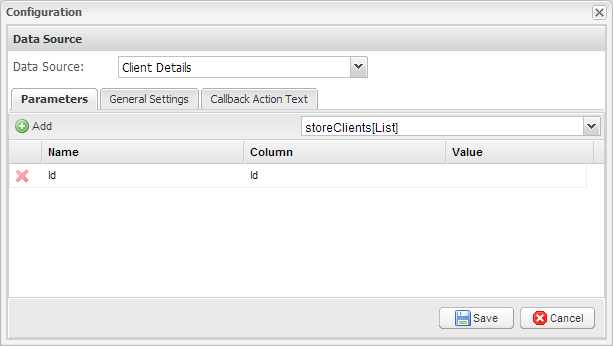
- Set Data Source to Client Details
- From the Select store adapter dropdown select storeClients[List]
- Add a Parameter, call it Id and select Id from the Columns dropdown
- In the General Settings tab, check the Open Window in popup checkbox and set Width to 700 and Height to 400
- Click Apply and click Save
- In the Sections tab, click on grdClients and then click on Settings
- Click on Add Grid Column and click on Command Column
- Set this column to the top of the list
- Select this column to be able to edit its settings
- Leave Header blank and set width to 60 90
- Click on the Command Columns tab
- Click Add Command Column and click ActionCommand
- Set Command Name to Detail and set the Icon to Magnifier
- Set Action to clientDetailPage
- Again click Add Command Columns and click ActionCommand
- Set Command Name to Delete and set Icon to Decline
- Set Action to storeClients_Delete; click Save
- Click Save in the Configuration window
- Click Add Command Column and click ActionCommand
- Make sure grdClients it still selected and click on Listeners
- Select Command
- Set Fn to PageManager.grid_command_grdClients
- Click Save
- Click on Save Page at the top left of the screen, and click Ok to the Page Was Saved notification
- Deploy your solution and log out and log in. See click on your solution to see the page: