...
- Click on Presentation and then Pages.
- Click New Page

- From Categories, select General and from Templates select Blank; name the page Navigation Update; click Save.
- On save you will be redirected to the detail page of the Navigation Update page
- Click on the Paramters tab and click Add
- Set name to Id, Type to Integer, and Required to Yes
- Click on the General tab and launch the Page Builder by clicking on Page Builder

- Load the Navigation Library to this page as instructed here: 1. Navigation Library PagesIn the Page Builder, find the DOM tab and click on PageManager
- Click on Settings
- Click on the Resources tab and click Add
- Set Name to NavLib, type to Ready
- Click on the magnifying glass on the far right of the Uri and load the Navigation Library by clicking on the green checkmark
- Click Save and click Save again in the Configuration window

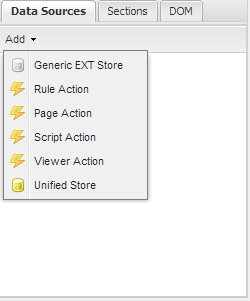
- In Data Sources click the Add button and add a Unified Store
- Call it storeUpdate
- Click on Settings
- Set the Data Source to Client
- Check the Detail and Modify checkboxes
- In the Detail tab click Properties
- To Before Load add: showMyLoadingMask showMyLoadingMask('Loading...');
- To Load add: hideMyLoadingMask hideMyLoadingMask();
- Check Auto Load

- Click Save
- Find the Id attribute and set its Value to Id

- In the Modify tab click Properties
- Into Success Addadd:
EcxPageNav.Util.executeParentCallback();
EcxPageNav.Util.closeMe(); 
- Click Save
- Find the Id attribute and set its Value to Id
- Click Save in the Configuration window
- Arrange the controls on this page in the same manner as on Navigation New: 2. Navigation New
- Make sure pnMain is selected and click on TopBar
- Add a button called Click Save with Icon Disk
- Set the listener to Click Save and Fn to PageManagerto PageManager.ruleAction_execute_storeUpdate_Modify
- Click on Save Page at the top left of the screen, and click Ok to the Page Was Saved notification