In Part 1 we created a simple page for creating a Client. We now will create a simple Contract workflow and attach contracts to Clients.
Create Workflow
- Open Application Studio of your solution
- From the left menu, select Processes -> Workflows
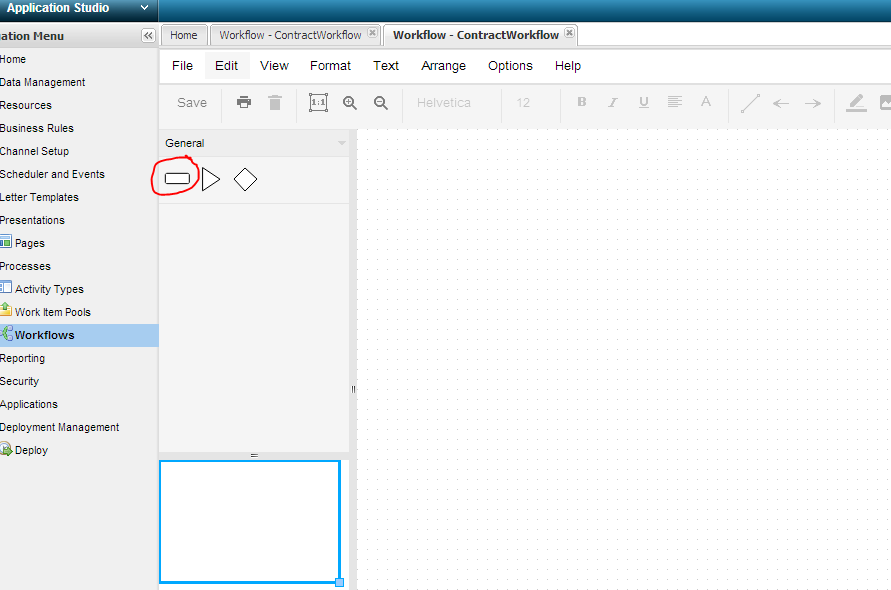
- Click on
 button. The New Workflow window pops up.
 Fill in the following fields:
Property Value Workflow Name ContractWorkflow Workflow CW Select Business Object -- New -- New Object Name ContractWI New Object API Permanent ID ContractWI - Click the
 button on the bottom right of the window. You'll be redirected to the detail page of the newly created Workflow.
 - Click on the
 button. You'll be redirected to the Workflow Builder.
 - Drag the rectangle (Activity) onto the canvas. When you place the rectangle, the New Activity window pops up.
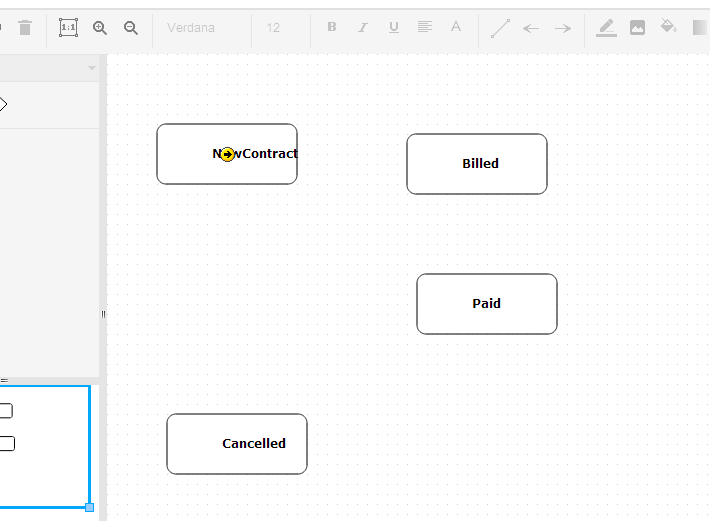
Fill in the following fields and click the
 button.
Property Value Activity Name NewContract Shortname CW_1 Activity Usage Index Activity Type Simple Drag three more Activites onto the canvas with the following information:
Activity Name Shortname Activity Usage Activity Type Billed CW_2 Index Simple Paid CW_3 Index Simple Cancelled CW_4 Index Simple - Place your mouse on the middle of the New Contract and you should see a yellow circle with an arrow show up. Click on it and drag it over to the Billed Activity. The New Transition window shows up.
- Review the information in the window and click the button.