Step 1 – Create a Client Modify Page
The Modify Screen will load from the Client List and populate with all the Client's information and allow for editing and saving.
- Click on Presentation and then Pages.
- Click New Page

- From Categories, select General and from Templates select Blank; name the page Client Modify; click Save.
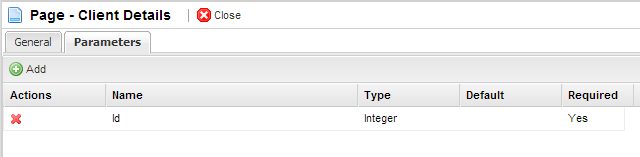
- On save you will be redirected to the detail page of the Client Modify page, from here click on the Parameters tab
- Add a new parameter, name Id, type Integer, and set Required to Yes
- Go to the General tab and launch the Page Builder by clicking on Page Builder

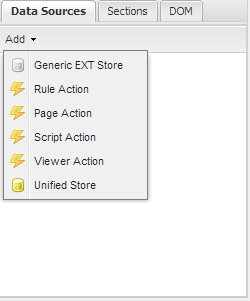
- In Data Sources click the Add button and add a Unified Store
- Set its ID to storeClients and click Create
- Make sure storeClients is selected and in the Properties panel at the right of the screen, click on Settings
- Set Data Source Type to Business Objects
- Set Data Source to Client
- Check the Detail checkbox and the Modify checkbox
- In both the Modify and Detail tabs find the Id parameter and double click on its Value column
- Select Id as the page parameter for both
- In the Detail screen, click properties and check the AutoLoad checkbox, click Save
- In the Modify tab, click on Properties and type clientModified(); into the Success textarea; click Save
- Click Save in the configuration window.
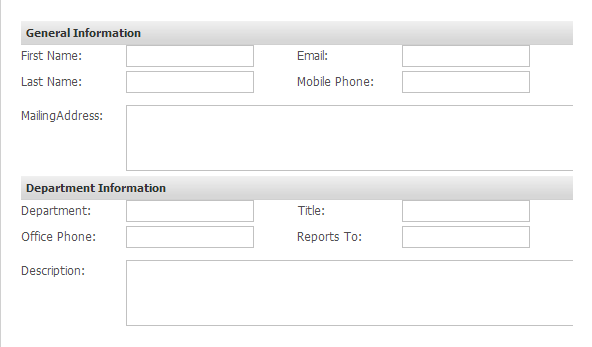
- Now create a form in the same manner as in previous lessons so that final result looks like this:
- Make sure pnMain is selected and click on TopBar
- Add a button called Save and set its icon to Disk; click Apply
- Add a click listener with Fn PageManager.ruleAction_execute_storeClients_Modify; click Apply
- Click Save
- Click on the Source tab to see the page's code
- Add the following code between the <head> tags
<script language="javascript"> function clientModified() { parent.clientModifyPage.close(); } </script>- Click Apply Source Code
- Click on Save Page at the top left of the screen, and click Ok to the Page Was Saved notification

Step 2 – Link to Client Search Page
- Find the Client Search Page
- Add a new Data Source, a Page Action, called clientModifyPage
- Open its Configuration screen
- Set Data Source to Client Details
- From the Select store adapter dropdown select storeClients[List]
- Add a Parameter, call it Id and select Id from the Columns dropdown
- In General Settings, check the Open Window in popup checkbox and set Height to 425 and Width to 700; click Apply
- Paste grdClients.getStore().reload(); into Callback Action Text
- Click Save
- To grdClients add another ActionCommand, this time call it Detail with icon Pencil and Action clientModifyPage
- Click Save
- Click Save page and click OK to Page was saved
- Deploy your solution, log out and log back in, find your page in you solution:
