AppBase security is role based. A role is created in a solution, given certain rights (also in a solution), and assigned to a user in the User Management section of System Setup. This section will cover how to create a Role , give permission to a role and assign that role to a user. Any role conflicts are handled by the ACL algorithm.
Step 1 - Create a Role
For this step, we are assuming that a solution exist.
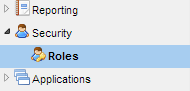
- Go to AppStudio for you solution.
- In the navigation menu go to Security and choose Roles
- In the Roles description page, create a new role by clicking the new role button.

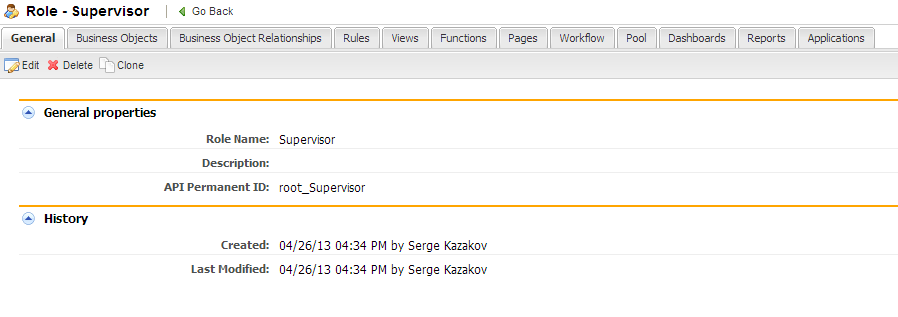
- Name this new role, say Supervisor, and click Save. The frame will refresh to the detail screen of the role.
Step 2 - Assign Permission to Role
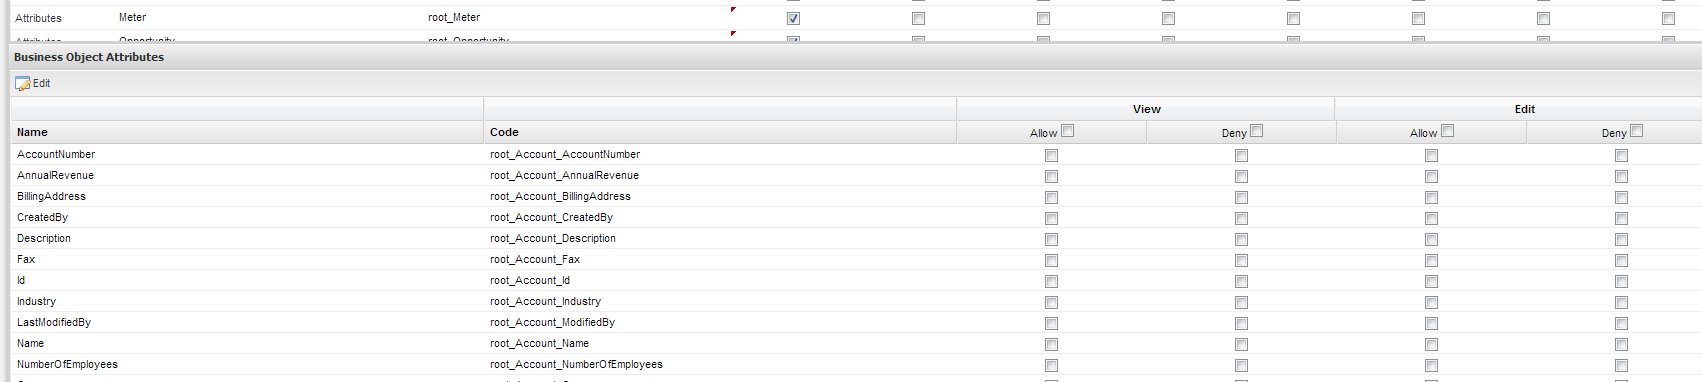
- Each tab in the role description section (excluding the general tab) has a list of the related objects along with check boxes to allow/deny permission. For example below is the Business Object tab

- NOTE: For the business Object section, clicking on the Attributes tab in the Actions column will give the list of attributes for the particular business object along with the permission check boxes
- NOTE: For the business Object section, clicking on the Attributes tab in the Actions column will give the list of attributes for the particular business object along with the permission check boxes
- NOTE: By default, unchecked boxes are Allow.
- To assign permissions to a Role, first click on the Edit button. When finished, click save
Another way to assign security to objects is by navigating to the Detail section of an object and navigating to he Permissions tab
After satisfied with permission choices Deploy the solution
Step 3 - Assign Role to a User
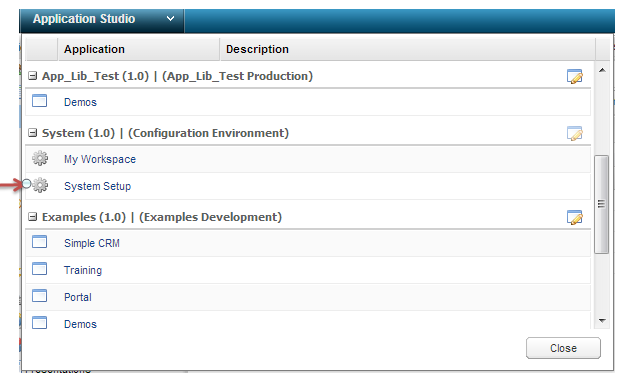
- After Deploying the Solution, Navigate to System Setup by clicking on the top left hand corner where it says Application Studio
- Once in System Setup, go to User Management and choose Users
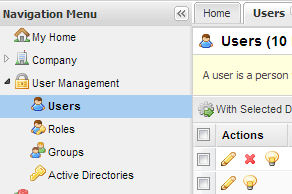
- Click on the User you wish to add the role to, for example John Doe

- In the users detail screen, go to the User Roles tab
- In the User Roles section, click Edit
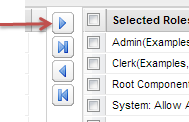
- Locate the Role created in the Available Role section (in the left hand side) and move it to the right, Selected Roles, by clicking on the right arrow
- Click Save
To test the role, log out and log in as the user the the selected role
NOTE: If the role that was created is not visible, make sure that the solution was redeployed.