Step 1 – Create a Work item
A work item is a record from a business object that goes through a workflow
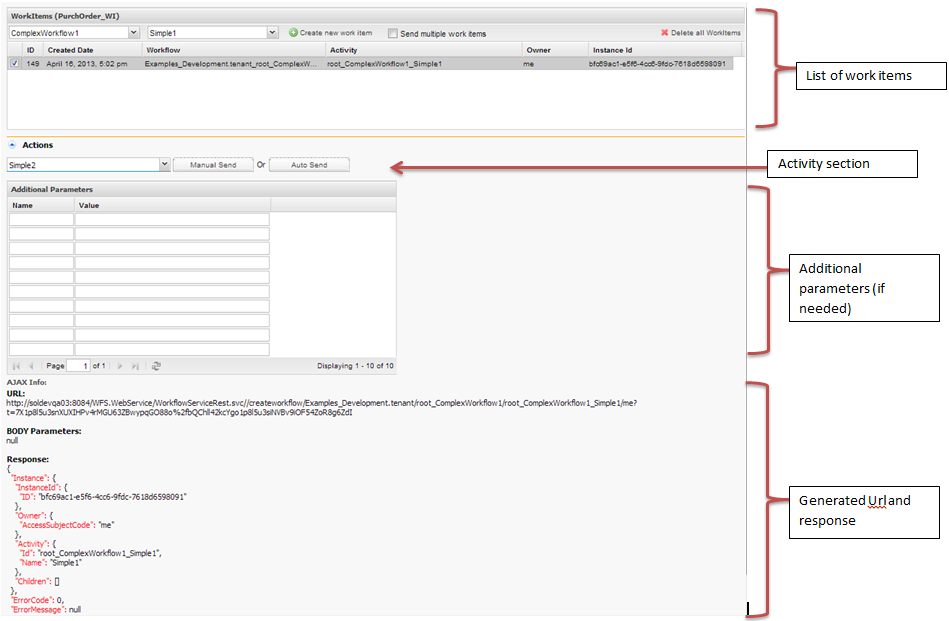
- Choose a Workflow and an Activity. For this example choose Complex Workflow 1 with activity Simple 1
- Click on create “Create new work item”

- Notice that a work item has been created and is displayed in the work item section and is currently in activity Simple 1
- The application also displays the generated URL along with the response from the server
Notice that the work item has an instance id associated with it. This id is unique to this work item and is used to identify it throughout the workflow.
Step 2 – Send Work item to activity Simple 2
- Click on the newly created work item
- Navigate to the Actions section of the application and choose activity Simple 2
- Click on Manual Send to move the work item to the next activity.
- Notice that the in activity column has been updated to Simple 2 ( instance id did not change)
The second button Auto Send is used to send a work item to a pre-defined activity (which can be configured in a rule) after a certain event has been triggered. For this tutorial, Auto Send will not be used.
Step 3 – Send Work item to activity Split1
- Redo Step 2 but now choose activity Split1 in the actions section
This activity is special for it splits the work item into two child work items. The System will create two new instance ID’s that will identify the two new work items. When the work items will be joined, the system will automatically take care of the two child work items
Step 4 – Split the work item and send to Simple 4 and Simple 5
- Click on the work item and select Activity Simple 4 and Simple 5 in the actions section

- Click on Manual Send
- Notice that two work items have been created
- One child work item is in activity Simple 4
- Another child work item is activity Simple 5
- The parent work item remains in activity Split1

Step 5 – Send child work item in Simple 5 to activity Simple 6
- Redo Step 2 for appropriate changes to send work item in Simple 5 to Simple 6
Step 6 – Join the child work items in activity Join1
This step will move the child work items to activity Join1. When both of the work items are in the Join1 activity the system will automatically move the parent work item to Join1 and combine it with the child work items
- Repeat Step 2 to send child work item in Simple 4 to Join1
- Repeat Step to send child work item in Simple 6 to Join1
- Notice that the work items section refreshes to display only the parent work item (identified by the instance id)

Step 7 – Finish the workflow by sending work item to activity Simple 7
- Repeat Step 2 with appropriate changes