Step 1 – Create Department List
- Click on Presentation and then Pages.
- Click New Page

- From Categories, select General and from Templates select Blank; name the page Department Search; click Save.
- On save you will be redirected to the detail page of the Department Search page, from here launch the Page Builder by clicking on Page Builder

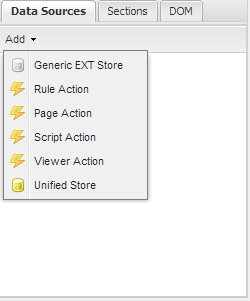
- In Data Sources click the Add button and add a Unified Store
- Set its ID to storeDepartments and click Create
- Make sure storeDepartments is selected and in the Properties panel at the right of the screen, click on Settings
- Set Data Source Type to Business Views
- Set Data Source to Dashboard View
- Delete the Id elements, leaving only ClientId and ClientDepartment
- Check the List checkbox
- Click Save
- Make sure pnMain is selected and in Properties set its layout to border
- Into the pnMain design surface drag a Grid and call is grdDepartments
- Set its region to center
- Click on Settings and set its Data Source to storeDepartments[List]
- Move both ClientId ClientDepartment into the column panel
- Move ClientDepartment to the top of the list and change its Header to Department and its Width to 200
- Change the Header of ClientId to Number of Clients and set it to Auto Expand
- In the General tab, check Use Paging and set Selection Mode to Row Selection
- Click Save
- Click on TopBar
- Add a new button, call it Export and set its Icon to PageWhiteExcel; click Apply
- In the Listeners tab, set its Listener to Click and set Fn to PageManager.grid_export_grdDepartments; click Apply
- Click Save
Step 1 – Create Search Panel
- Drag an Ecx Search Form into pnMain and call it searchDepartments; set its region to east
- Click on Settings
- Set the Data Source to storeDepartments[List]
- Add ClientId and ClientDepartment as search criteria
- Set the Control Label of Client Id to Number of Clients; click Apply
- Set the Control Label of Client Department to Department; click Apply
- Click Save
- Click on TopBar
- Add a button called Search with icon Magnifier
- Set its click listener to function PageManager.searchForm_search_searchDepartments; click Apply
- Add another button called Clear with icon Erase
- Set its click listener to function PageManager.searchForm_clear_searchDepartments; click Apply
- Click Save
- Click on Settings
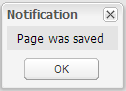
- Click on Save Page at the top left of the screen, and click Ok to the Page Was Saved notification
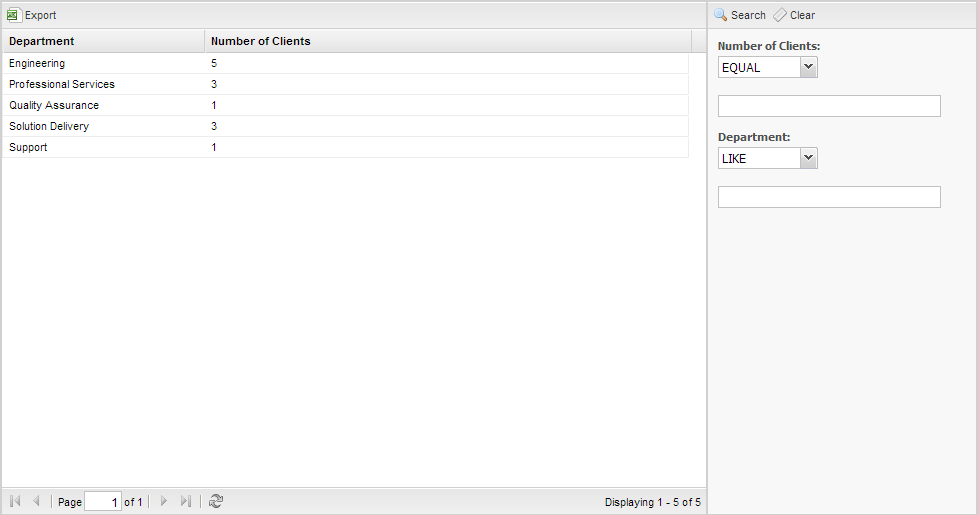
- Add the page to your application and deploy. The page will look like this in your solution: